- +86 189 0312 3772
- sales@metalskingdom.com
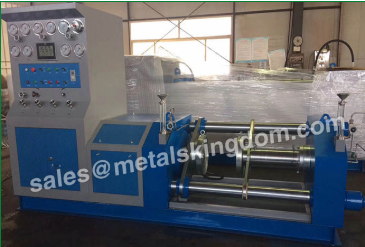
Valve test beds exist for testing purposes. Do you know how valve test beds are normally tested? The following is a detailed introduction from Valve Grinding Machine Supplier.
1. Clamp the valve under test. The "seal pressure" value is calculated according to the "pressure comparison table and calculation formula" according to different valve sizes and pressures.
2. Open the pressure relief valve, open the low-pressure water pump switch, until the water from the hydraulic outlet, close the pressure relief valve to the pressure gauge pointer to start the action, close the low-pressure pump.

3. Close the valve opening and closing parts.
4. Press the "pressurization open" switch, and then rotate the "pressure adjustment" knob clockwise to make the reading of the test pressure gauge reach the value to be tested. Open the "pressure holding timing" switch, and the time relay will start timing. (in accordance with GB4981 and ISO5208-1982 standard test pressure shall be equal to 20 ℃ under the maximum allowable working pressure of 1.1 times. In accordance with the ZBJ16006-90 standard test pressure shall be equal to 38 ℃ when the nominal pressure of 1.1 times), (low pressure smaller size valves should cooperate with "pressurization rate" knob, should be before the crackdown on the knob counterclockwise rotation to minimum).
5. We judge whether the valve under test by the Valve Test Machine is qualified by the pressure drop during the test duration. There are two test pressure gauges on the operation panel, one with a full range of 10MPa and the other with a full range of 60MPa. The use of two tables is beneficial to improve the measurement accuracy at low pressure. But be sure to note: when the test pressure is greater than 6MPa, be sure to turn off the low-voltage meter switch, in order to prevent the low-voltage meter broken.
6. Turn on the "pressure relief switch" to reset the test pressure gauge to zero. Then turn the "pressure adjustment" knob counterclockwise to make the system pressure less than 0.5mpa.
7. Press the "release" button, rotate the "pressure adjustment" knob clockwise to loosen the valve under test, and then rotate the "pressure adjustment" knob counterclockwise to make the system pressure less than 0.5mpa.
8. Remove the valve under test. This completes the testing of a valve.
Above is the whole process of the Valve Test Bench.